- 1. authorization-server
- 1.1 手工测试
- 1.2 遇到错误怎么办?
- 1.3 修改配置文件
- 1.4 开发
- 1.5 测试
- 2 login
- 2.1 手工测试
- 2.2 使用 9000 登陆
- 2.3 使用 github 登陆
- 2.4 使用 google 登陆
- 2.4 自动化测试
- 3. Resource Server
- 3.1 hello-security
- 3.2 jwe
- 3.3 static
- 3.4 Opaque
Spring Security OAuth2
①②③④⑤⑥⑦⑧⑨⑩⑪⑫⑬⑭⑮⑯⑰⑱⑲⑳✕✓✔✖
这里文档描述了 Spring Security 官方例子的中的 OAuth2 部分的内容,与 Spring Authorization Server 的例子有点重复。但是这里重点描述了 Resource Server
- OAuth2.0
- Authorization Server
- Login- Spring Boot
- Resource Server
- Hello Security - Spring Boot
- JSON Web Encryption (JWE)
- Multi-tenancy
- Opaque Token
- Static
- WebClient - Spring Boot
1. authorization-server
1.1 手工测试
① authorization_code 模式
得到 code
在浏览器的地址栏中输入:
- http://localhost:9000/oauth2/authorize?response_type=code&client_id=login-client&scope=openid&state=state&redirect_uri=http://127.0.0.1:8080/authorized
注意事项
- 只用 client_id,不需要密码
- redirect_uri 一定要提前配置在系统中,并且与请求 token 时的保持一直
- state 是客户端生成的随机码,用户保证服务器返回保持一致
如果是第一次登陆,需要认证,请输入系统内置的用户名和密码:user password
如果要确认 Scope,那么会弹出范围确认页面。
使用 Post 认证模式得到 token
curl --location --request POST 'http://localhost:9000/oauth2/token?grant_type=authorization_code&client_id=login-client&client_secret=openid-connect&redirect_uri=http://127.0.0.1:8080/authorized&code=ZHccPMG-odfrGRQZt5iU9i_I0xpn2S25CjsDonHJIWUO9piBGeNNlwIrlZ2t_jUhgKLnug3yrCsb53A6S-Zh5t2rcI3i9XEt5mQZIWLacmVgIlu5xboK16cWCNzHwXT6'
使用 Basic 认证模式得到 token
curl --location --request POST 'http://localhost:9000/oauth2/token?grant_type=authorization_code&redirect_uri=http://127.0.0.1:8080/authorized&code=3Opv5cyLcKG5gOB2BIkuhx8IUrIjPmzhq1PozNS-lF9nWFBQnatLwhzr2OXVKznmPCrdY3E1SHedNhiZUd5CsKdouSuxO5tkihPIo0R-VD6_dtVwoC5-jlSbTrmEMAFU' \--header 'Authorization: Basic bG9naW4tY2xpZW50OnNlY3JldA=='
这里将用户名与密码进行编码后变成了bG9naW4tY2xpZW50OnNlY3JldA==
② Refresh Token
curl --location --request POST'http://localhost:9000/oauth2/token?grant_type=refresh_token&client_id=login-client&client_secret=openid-connect&refresh_token=5mxZe5wfyIzIRUuIQHR32pLRXdeooSHGPbw5IhXpR6zdBseG8jSbPf4EER-WkbugX4KEs-HOc5djtFjjo3zLRnjWhpoFzB1QDoDSqKyJm7dL_Mwztlpga6IoOZo7bm3J'
③ client_credentials 模式
该模式下,不需要登陆认证,就能直接得到 code。
curl --location --request POST'http://localhost:9000/oauth2/token?grant_type=client_credentials&scope=message:read'\ --header 'Authorization: Basic bWVzc2FnaW5nLWNsaWVudDpzZWNyZXQ='
也可以把用户名与密码放到参数中
curl --location --request POST'http://localhost:9000/oauth2/token?grant_type=client_credentials&client_id=messaging-client&client_secret=secret&scope=message:read'
④ authorization_code+PKCE 模式
在线生成的页面地址: https://tonyxu-io.github.io/pkce-generator/
// Spring官方测试脚本中得到的例子private static final String S256_CODE_VERIFIER = "dBjftJeZ4CVP-mB92K27uhbUJU1p1r_wW1gFWFOEjXk";private static final String S256_CODE_CHALLENGE = "E9Melhoa2OwvFrEMTJguCHaoeK1t8URWbuGJSstw-cM";S256
| Parameter | Required | Description |
|---|---|---|
| response_type | 必须 | 您要执行的 OAuth 2.1 流程,code=Authorization Code ,这个可以使用PKCE |
| client_id | 必须 | 您的应用程序的 ID |
| redirect_uri | 必须 | 回调的地址,如果不填写,会报错,并且填写的内容与设置的一致 |
| state | 推荐 | 应用程序添加的一个数值,回调的时候会原封不动的返回。可以判断是不是服务器返回的。 |
| code_challenge | 必须 | 对code_verifier运用hash算法s256加密得到一个code_challenge。 |
| code_challenge_method | 必须 | 必须填写:S256 ,不然 Spring 提示错误 |
| scope | 可选 | 请求的范围 |
按照这个来得到 code
http://localhost:9000/oauth2/authorize?response_type=code&client_id=login-client&scope=openid&state=state&redirect_uri=http://127.0.0.1:8080/authorized&code_challenge=E9Melhoa2OwvFrEMTJguCHaoeK1t8URWbuGJSstw-cM&code_challenge_method=S256
得到 token
curl --location --request POST'http://localhost:9000/oauth2/token?grant_type=authorization_code&client_id=login-client&redirect_uri=http://127.0.0.1:8080/authorized&code_verifier=dBjftJeZ4CVP-mB92K27uhbUJU1p1r_wW1gFWFOEjXk&code=C3PD5FrCuD9nIlqTOVkHm8CR1ASn0gd_Cu3DcgSPb80nLl8MzWWUVW822fUXsL_CrVwBOProla1mZL8GIWXrUGptWkqf7wv9D3v--d4F1K8MSogiiKDaa5KiwsdMq_Ki'
非常重要
代码中一定要设置 ClientAuthenticationMethod.NONE
.clientAuthenticationMethod(ClientAuthenticationMethod.NONE) // 为了PKCE
1.2 遇到错误怎么办?
看源代码
- OAuth2ClientAuthenticationFilter : 客户端认证的 Filter 。
- OAuth2TokenEndpointFilter:访问
/oauth2/token的 Filter 。 - OAuth2AuthorizationCodeAuthenticationProvider:用来得到 OAuth2AccessToken OAuth2RefreshToken OidcIdToken
- BearerTokenAccessDeniedHandler:拒绝 TokenAccess 的处理程序
1.3 修改配置文件
新建一个工程,引入依赖
implementation 'org.springframework.security:spring-security-oauth2-authorization-server:0.2.3'// 这个就不用引用了 implementation 'org.springframework.boot:spring-boot-starter-security'
配置端口为 9000
server:port: 9000
1.4 开发
开发一个简单的 SpringBootApplication
定义一个普通的启动程序:OAuth2ASApplication
定义安全配置
- @Beanpublic SecurityFilterChain standardSecurityFilterChain(HttpSecurity http) throws Exception{http.authorizeRequests(authorize->authorize.anyRequest().authenticated()).formLogin(Customizer.withDefaults());return http.build();}
自定义一个测试用户
- @Beanpublic UserDetailsService userDetailsService(){UserDetails userDetails= User.withUsername("user").password("{noop}password").roles("USER").build();return new InMemoryUserDetailsManager(userDetails);}
定义一个 IndexController,返回一个字符串:"Hello Author2AS!"
然后执行程序,http://localhost:9000/ 弹出对话框,输入用户名密码后,显示"Hello Author2AS!"
添加认证服务器代码,有 4 个部分是必须的。
一、指定加密算法:在整个系统运行的时候,会用到两个
@Bean:JWKSource与JwtDecoder,这两个主要是利用非对称加密算法,对要加密的部分加密。所以要创建一个KeyPair类。- @Beanpublic JWKSource<SecurityContext> jwkSource(KeyPair keyPair) {RSAPublicKey publicKey = (RSAPublicKey) keyPair.getPublic();RSAPrivateKey privateKey = (RSAPrivateKey) keyPair.getPrivate();// @formatter:offRSAKey rsaKey = new RSAKey.Builder(publicKey).privateKey(privateKey).keyID(UUID.randomUUID().toString()).build();// @formatter:onJWKSet jwkSet = new JWKSet(rsaKey);return new ImmutableJWKSet<>(jwkSet);}@Bean@Role(BeanDefinition.ROLE_INFRASTRUCTURE)KeyPair generateRsaKey() {KeyPair keyPair;try {KeyPairGenerator keyPairGenerator = KeyPairGenerator.getInstance("RSA");keyPairGenerator.initialize(2048);keyPair = keyPairGenerator.generateKeyPair();}catch (Exception ex) {throw new IllegalStateException(ex);}return keyPair;}@Beanpublic JwtDecoder jwtDecoder(KeyPair keyPair) {return NimbusJwtDecoder.withPublicKey((RSAPublicKey) keyPair.getPublic()).build();}
在另外一个例子
default-authorizationserver中没有JwtDecoder,因为在查看文档中,这个类是用在客户端解析用的。另外例子default-authorizationserver中的代码撰写的比较清晰。
二、指定
ProviderSettings- @Beanpublic ProviderSettings providerSettings() {return ProviderSettings.builder().issuer("http://localhost:9000").build();}
三、配置
SecurityFilterChain- @Bean@Order(1) //参数值越小优先级越高public SecurityFilterChain authorizationServerSecurityFilterChain(HttpSecurity http) throws Exception{OAuth2AuthorizationServerConfiguration.applyDefaultSecurity(http);return http.formLogin(Customizer.withDefaults()).build();}
四、配置客户端注册信息
- @Beanpublic RegisteredClientRepository registeredClientRepository(){RegisteredClient loginClient =RegisteredClient.withId(UUID.randomUUID().toString()).clientId("login-client").clientSecret("{noop}openid-connect").clientAuthenticationMethod(ClientAuthenticationMethod.CLIENT_SECRET_BASIC).clientAuthenticationMethod(ClientAuthenticationMethod.CLIENT_SECRET_POST).clientAuthenticationMethod(ClientAuthenticationMethod.NONE) // 为了PKCE.authorizationGrantType(AuthorizationGrantType.AUTHORIZATION_CODE).authorizationGrantType(AuthorizationGrantType.REFRESH_TOKEN).redirectUri("http://127.0.0.1:8080/login/oauth2/code/login-client").redirectUri("http://127.0.0.1:8080/authorized").scope(OidcScopes.OPENID).scope(OidcScopes.PROFILE).scope("book:read").clientSettings(ClientSettings.builder().requireAuthorizationConsent(true).build()).build();RegisteredClient registeredClient= RegisteredClient.withId(UUID.randomUUID().toString()).clientId("messaging-client").clientSecret("{noop}secret").clientAuthenticationMethod(ClientAuthenticationMethod.CLIENT_SECRET_BASIC).clientAuthenticationMethod(ClientAuthenticationMethod.CLIENT_SECRET_POST).authorizationGrantType(AuthorizationGrantType.CLIENT_CREDENTIALS).scope("message:read").scope("message:write").build();return new InMemoryRegisteredClientRepository(loginClient,registeredClient);}
1.5 测试
结合客户端进行测试比较方便,这里只能对 client_credentials 模式进行测试。这里使用了RequestPostProcessor
@SpringBootTest@AutoConfigureMockMvcpublic class ClientCredentialsITests {private static final String CLIENT_ID="messaging-client";private static final String CLIENT_SECRET="secret";private final ObjectMapper objectMapper=new ObjectMapper();@Autowiredprivate MockMvc mockMvc;private static final class BasicAuthenticationRequestPostProcessor implements RequestPostProcessor{private final String username;private final String password;private BasicAuthenticationRequestPostProcessor(String username,String password){this.username=username;this.password=password;}@Overridepublic MockHttpServletRequest postProcessRequest(MockHttpServletRequest request){HttpHeaders headers=new HttpHeaders();headers.setBasicAuth(this.username,this.password);request.addHeader("Authorization",headers.getFirst("Authorization"));return request;}}private BasicAuthenticationRequestPostProcessor basicAuth(String username,String password){return new BasicAuthenticationRequestPostProcessor(username,password);}@Testvoid performTokenRequestWhenValidClientCredentialsThenOk() throws Exception{this.mockMvc.perform(post("/oauth2/token").param("grant_type","client_credentials").param("scope","message:read").with(basicAuth(CLIENT_ID,CLIENT_SECRET))).andExpect(status().isOk()).andExpect(jsonPath("$.access_token").isString()).andExpect(jsonPath("$.expires_in").isNumber()).andExpect(jsonPath("$.scope").value("message:read")).andExpect(jsonPath("$.token_type").value("Bearer"));}}
2 login
这个例子模拟了一个客户端,要运行这个例子,需要提前将 authorization-server 启动了。
redirect URI 默认的是http://127.0.0.1:8080/login/oauth2/code/login-client,也就是{baseUrl}/login/oauth2/code/{registrationId}。如果这个是运行在一个代理服务器后面,那么建议检查
Proxy Server Configuration来确认配置的正确性,同时也要看一看redirect-uri的URI template variables 。
2.1 手工测试
跳转到:http://localhost:9000/login 输入:user password 后会跳转到权限确认页面。
然后调转到:http://127.0.0.1:8080/
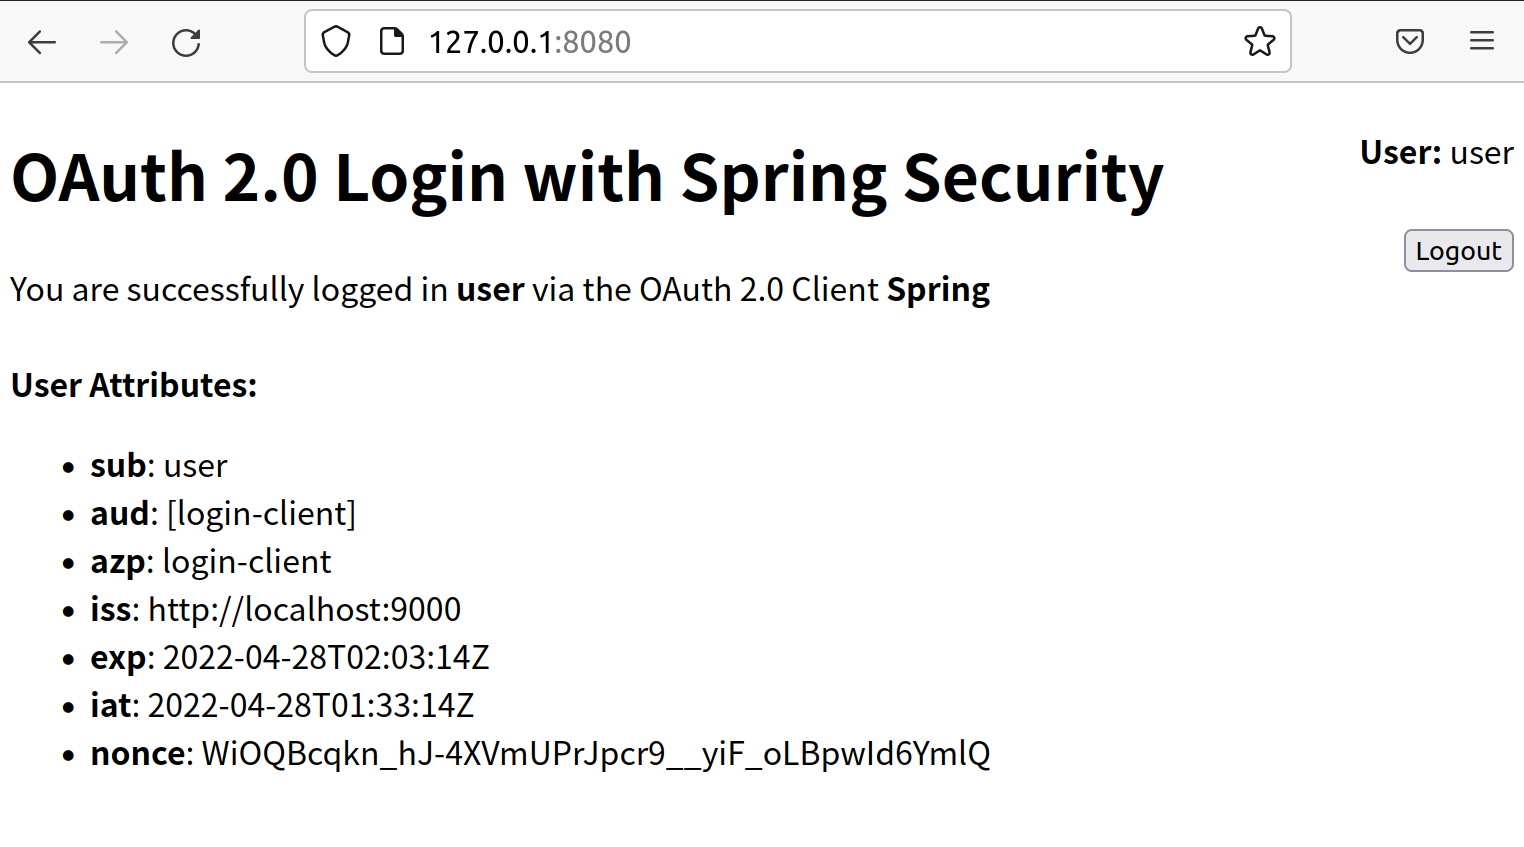
点击 logout,会跳转到登陆页面,这个登陆页面是 Oauth2 特定的登陆页,与其他的不一样。
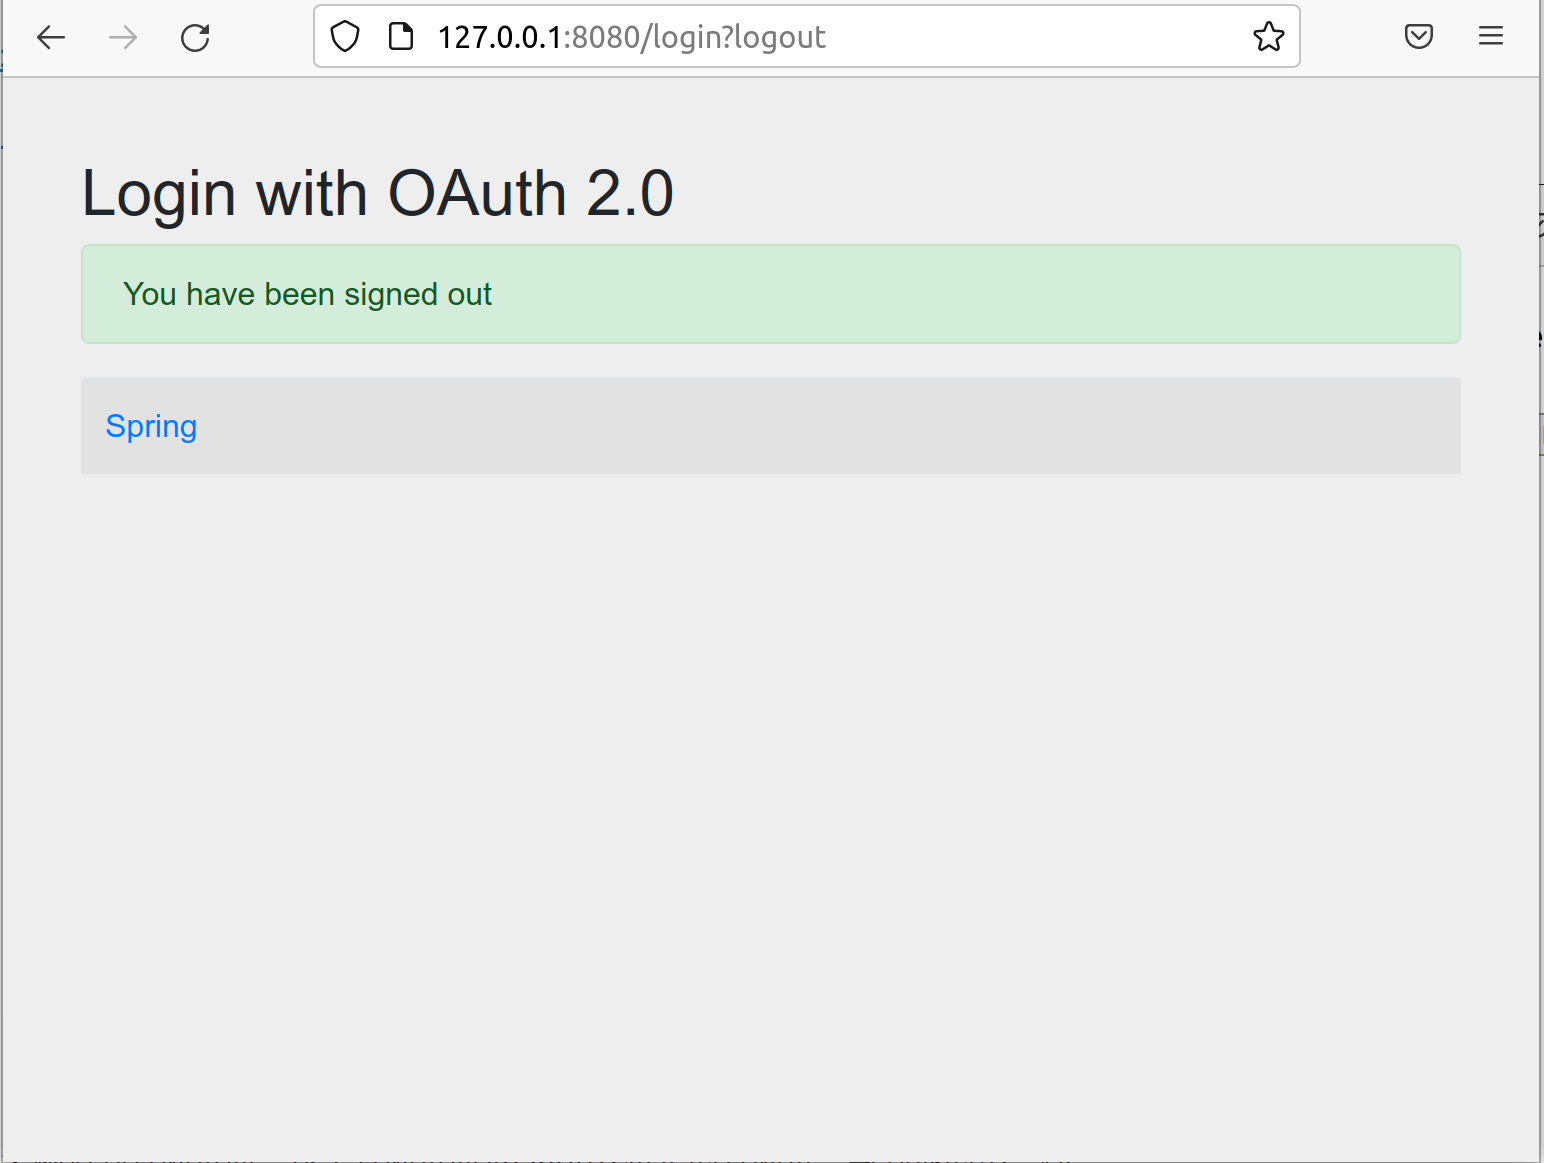
2.2 使用 9000 登陆
① 配置 application.yml
spring:security:oauth2:client:registration: <1>login-client: <2>provider: spring <3>client-id: login-clientclient-secret: openid-connectclient-authentication-method: client_secret_basicauthorization-grant-type: authorization_coderedirect-uri: http://127.0.0.1:8080/login/oauth2/code/login-clientscope: openid,profile <4>client-name: Springprovider: <5>spring:authorization-uri: http://localhost:9000/oauth2/authorizetoken-uri: http://localhost:9000/oauth2/tokenjwk-set-uri: http://localhost:9000/oauth2/jwks
<1> spring.security.oauth2.client.registration 是最基本的OAuth Client属性前缀。
<2> 在基本属性前缀之后是 ClientRegistration 的 ID,例如login-client 。 这个名字可以修改吗?可以,但是习惯上与client-id相同,为了好维护。
<3> provider 属性指定此 ClientRegistration 使用哪个提供程序配置。
<4> openid 要求Spring Authorization Server去按照authentication using OpenID Connect 1.0来执行。
<5> spring.security.oauth2.client.provider 是 OAuth Provider 属性的基本前缀。
备注:配置文件中的下面属性要跟 Spring Authorization Server 一致
- client-id client-secret
- 替换 http://localhost:9000 来与你的服务器一致。
② 添加 OAuth2LoginApplication
添加一个最基本的@SpringBootApplication程序。
③ 添加一个 Controller 与 HTML 页面
@Controllerpublic class IndexController {@GetMapping("/")public String index(Model model, @RegisteredOAuth2AuthorizedClient OAuth2AuthorizedClient authorizedClient,@AuthenticationPrincipal OAuth2User oauth2User) {model.addAttribute("userName", oauth2User.getName());model.addAttribute("clientName", authorizedClient.getClientRegistration().getClientName());model.addAttribute("userAttributes", oauth2User.getAttributes());return "index";}}
HTML 页面 省略
④ 添加 LoopbackIpRedirectFilter
OAuth2AuthorizationCodeRequestAuthenticationProvider.isValidRedirectUri 会判断RedirectHost如果是localhost就返回false。
String requestedRedirectHost = requestedRedirect.getHost();if (requestedRedirectHost == null || requestedRedirectHost.equals("localhost")) {// As per https://tools.ietf.org/html/draft-ietf-oauth-v2-1-01#section-9.7.1// While redirect URIs using localhost (i.e.,// "http://localhost:{port}/{path}") function similarly to loopback IP// redirects described in Section 10.3.3, the use of "localhost" is NOT RECOMMENDED.return false;}
为了屏蔽这个功能,就要添加一个 Filter
@Component@Order(Ordered.HIGHEST_PRECEDENCE)public class LoopbackIpRedirectFilter extends OncePerRequestFilter {@Overrideprotected void doFilterInternal(HttpServletRequest request, HttpServletResponse response, FilterChain filterChain)throws ServletException, IOException {if(request.getServerName().equals("localhost")&& request.getHeader("host")!=null){UriComponents uri= UriComponentsBuilder.fromHttpRequest(new ServletServerHttpRequest(request)).host("127.0.0.1").build();response.sendRedirect(uri.toUriString());return;}filterChain.doFilter(request,response);}}
2.3 使用 github 登陆
① 注册 OAuth application
- 登陆Register a new OAuth application
- Authorization callback URL 设置成:
http://127.0.0.1:8080/login/oauth2/code/github - 如果启动 device 流程,那么会向你的邮箱发送一个密码,输入密码后才可以登陆
- 启动代理服务器后,系统一般执行不正常
② 配置 application.yml
spring:security:oauth2:client:registration: <1>github: <2>client-id: github-client-idclient-secret: github-client-secret
将 client-id 和 client-secret 属性中的值替换为您之前创建的 OAuth 2.0 凭据。
③ 启动服务
启动服务http://127.0.0.1:8080
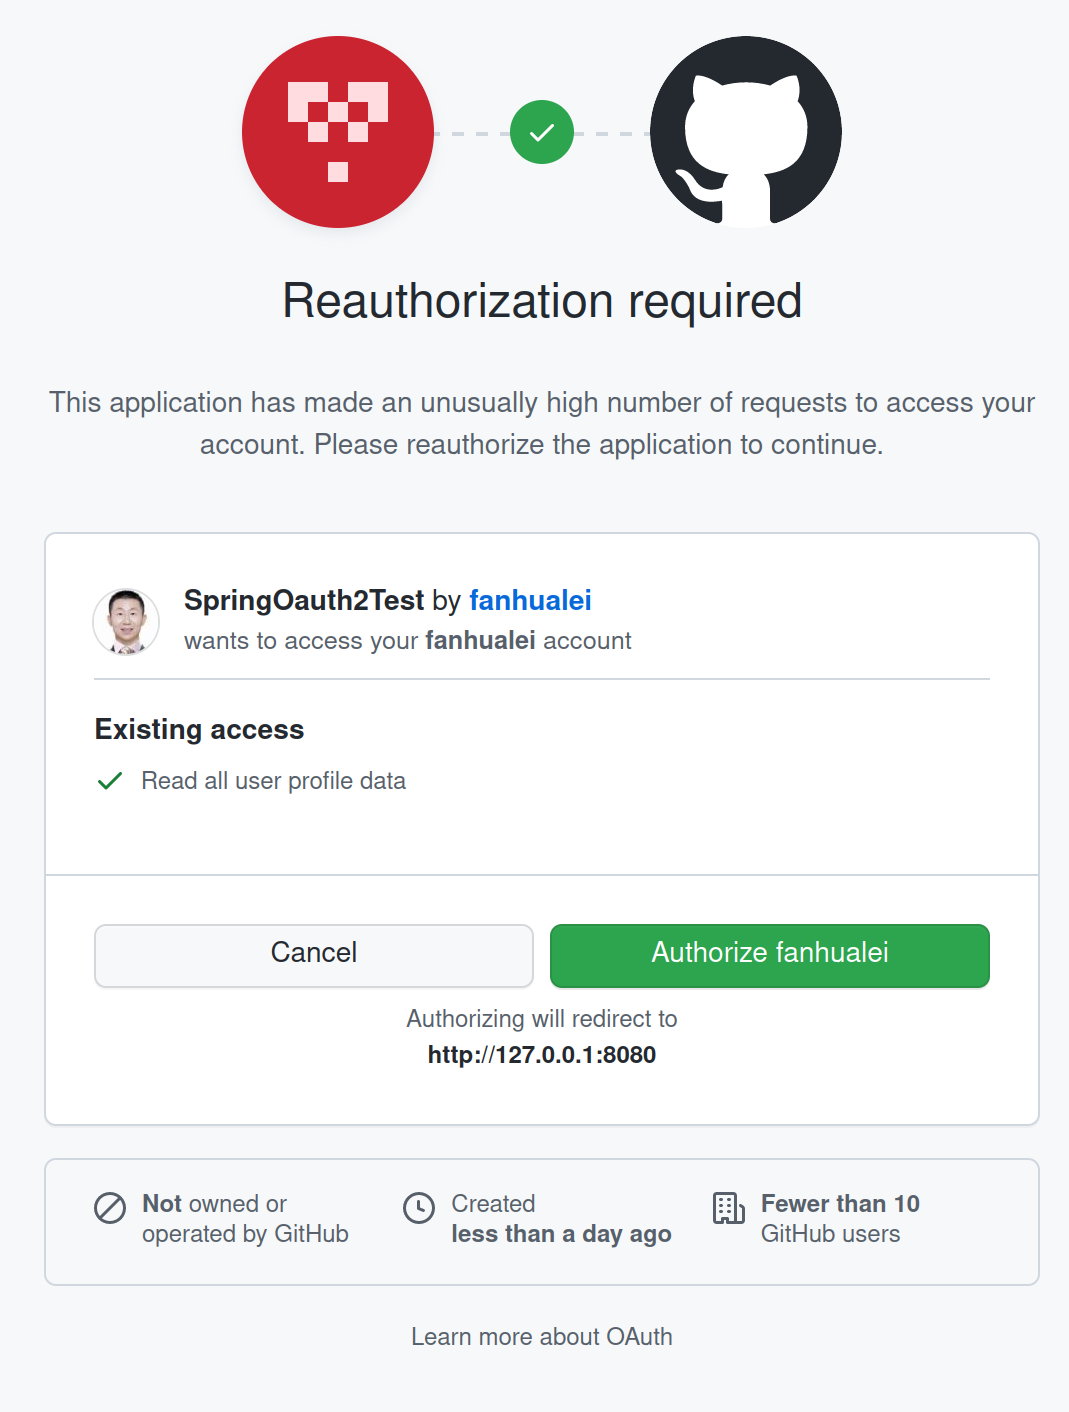
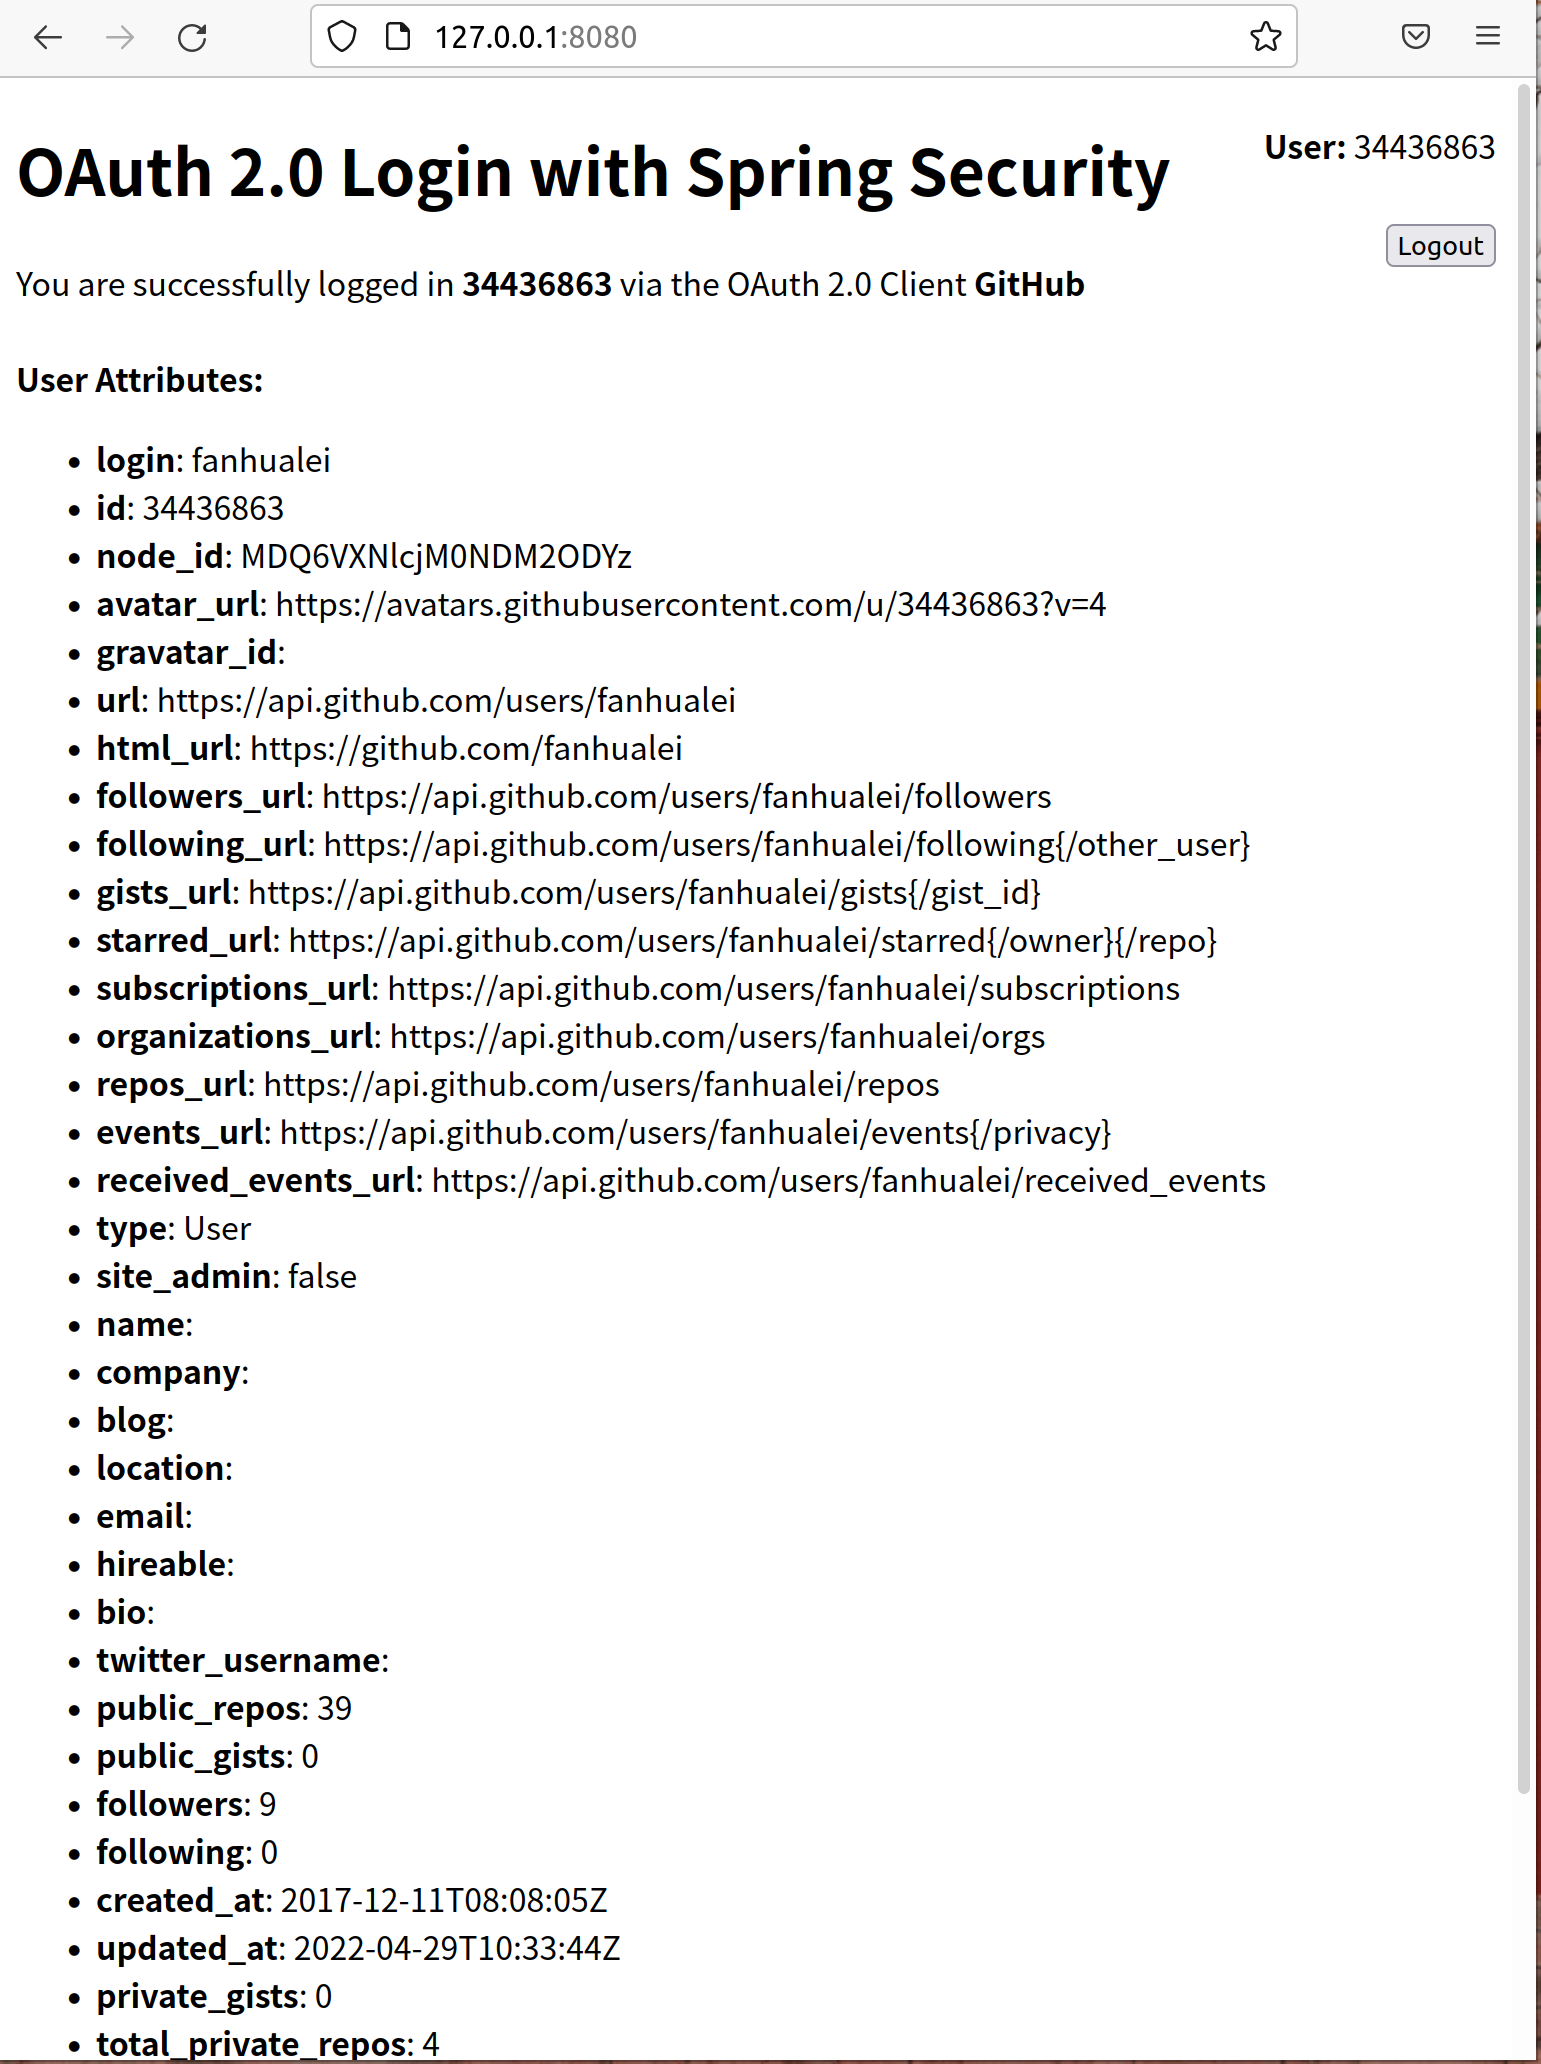
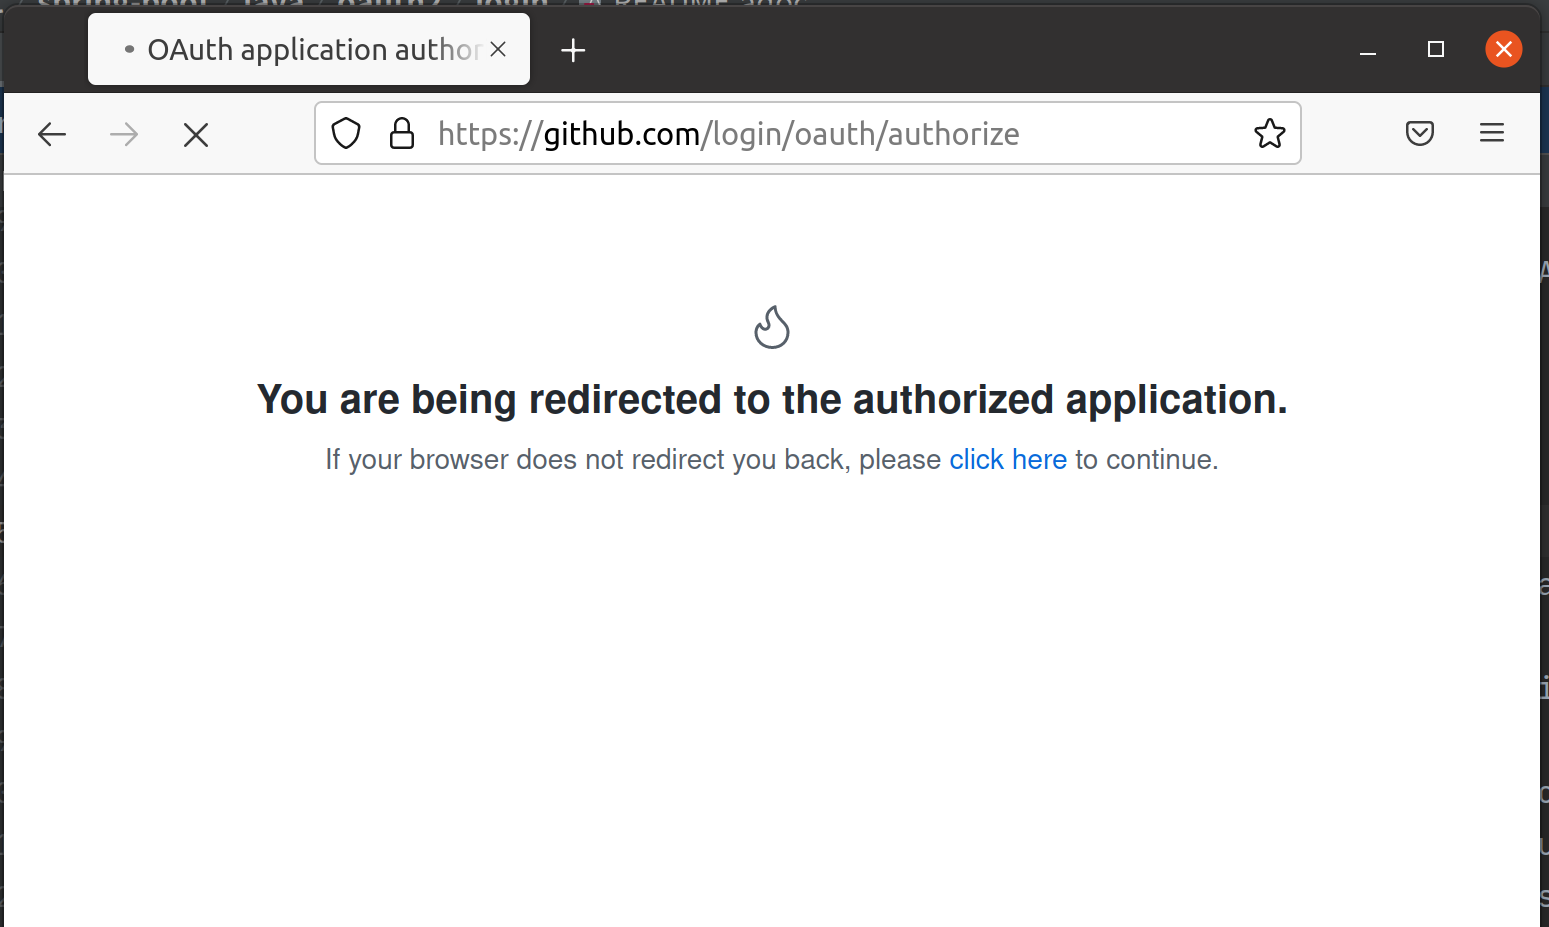
中间有可能会没有直接跳转成功,显示下面这个页面:
2.4 使用 google 登陆
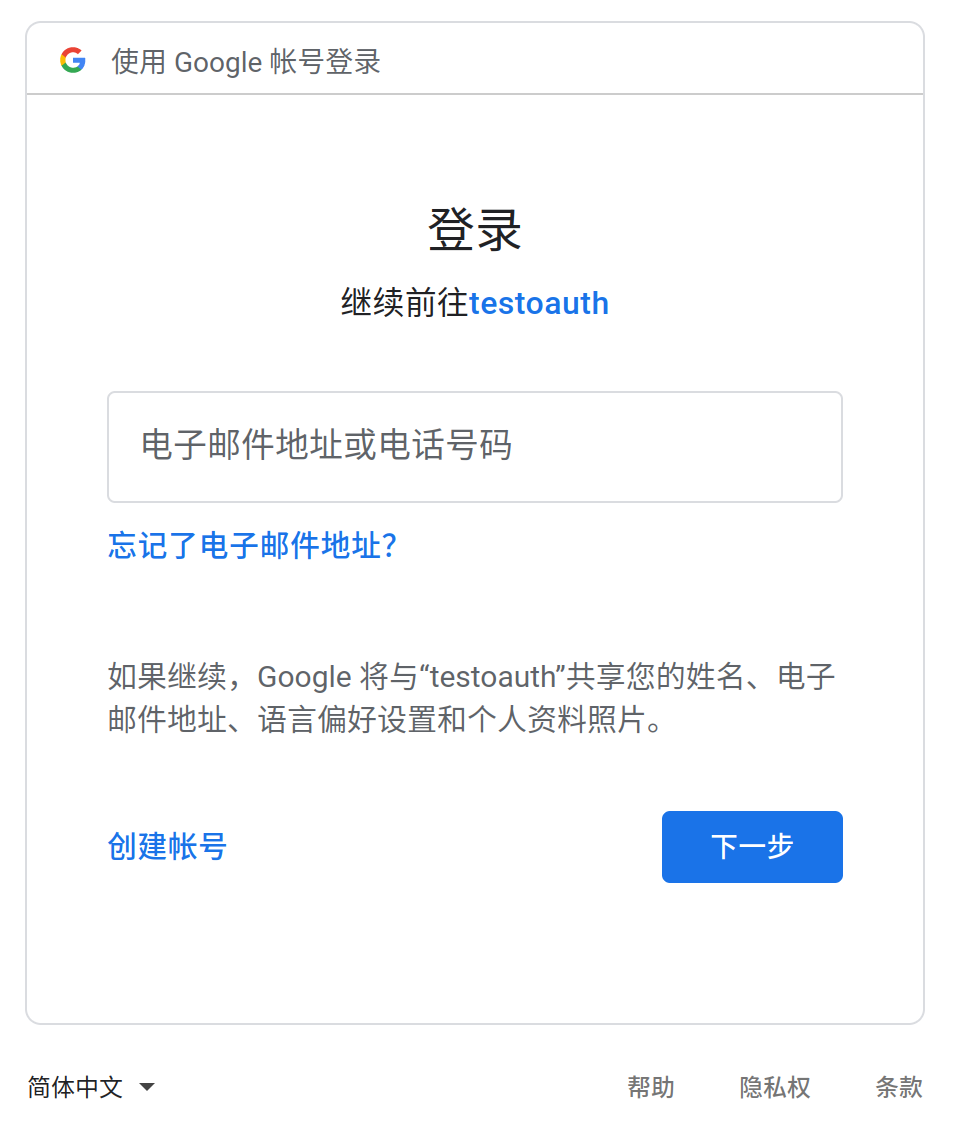
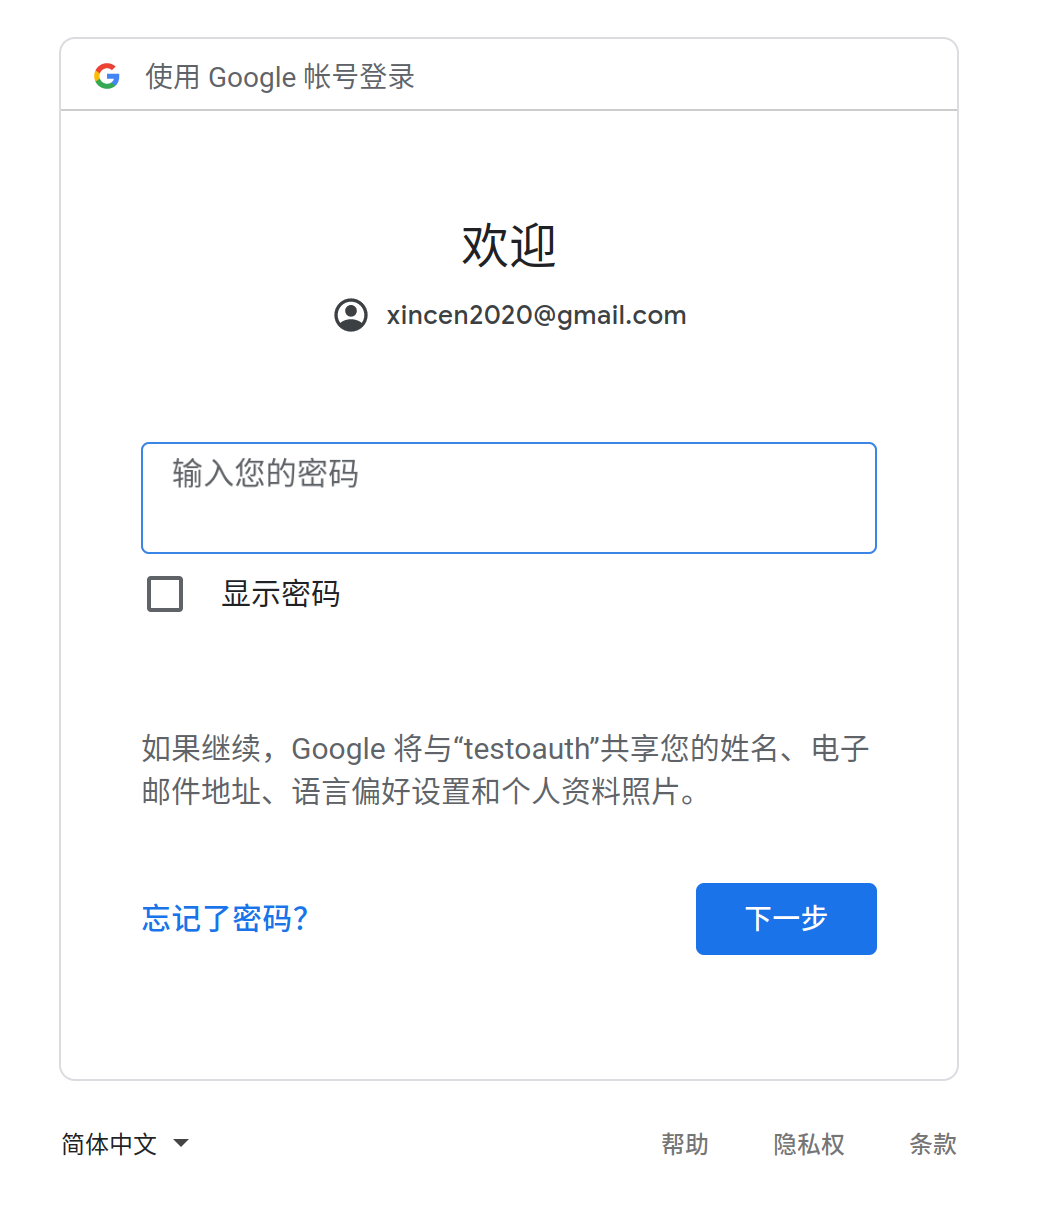
google 经常登陆不上,所以这里就不详细说明了。
2.4 自动化测试
① 怎么测试
测试 github 时,能不能不连接 github,模拟一个 github,主要测试下面的逻辑?
可以呀,这里要模拟一个为了得到 code 的请求,然后模拟一个 code,并做一个拦截器,把要获得的用户给模拟出来。
MockMvc 与 WebClient 的区别
Mvc 经常做单元测试,会模拟出一些登陆的用户。WebClient 一般做集成测试,会得到 HTML 页面上的元素,并模拟点击效果。
② MockMvc 测试
首先单元测试,可以通过 MockMvc 不通过认证服务器,就可以通过下面的方法模拟一个登陆
ResultActions resultActions=this.mvc.perform(get("/").with(oauth2Login()));
当然也可以指定 Client,认证方法,添加一些自定义属性
ClientRegistration clientRegistration = ClientRegistration.withRegistrationId("test").authorizationGrantType(AuthorizationGrantType.PASSWORD).clientId("my-client-id").clientName("my-client-name").tokenUri("https://token-uri.example.org").build();ResultActions resultActions=this.mvc.perform(get("/").with(oauth2Login().clientRegistration(clientRegistration).attributes(a->a.put("sub","spring-security")) ));resultActions.andExpect(model().attribute("userName","spring-security"));
③ 集成测试
测试的内容如下:
- 访问首页跳转到登陆页
- 访问其他页面,也跳转到登陆页
- 在登陆页面点击 Github,然后模拟要请求 code 的链接,并判断链接是正确的。
- requestAuthorizeGithubClientWhenLinkClickedThenStatusRedirectForAuthorization
- 在登陆页面点击 Github,如果连接地址不对,就返回 500 错误
- requestAuthorizeClientWhenInvalidClientThenStatusInternalServerError
- 在登陆页面点击 Github,然后模拟 Github 授权,然后显示首页
- requestAuthorizeCodeGrantWhenValidAuthorizationResponseThenDisplayIndexPage
- 在登陆页面点击 Github,模拟授权服务器返回 code 与 state,如果拿错误的 state,就报告错误。
- requestAuthorizationCodeGrantWhenInvalidStateParamThenDisplayLoginPageWithError
- 使用 MockOAuth2Login 函数来模拟一个登陆用户,并显示首页。
这里面做了一个拦截器,用来 tokenEndpoint 中返回的内容,用自己的模拟出来,同时也模拟了 userInfoEndpoint
@Beanpublic SecurityFilterChain securityFilterChain(HttpSecurity http) throws Exception{http.authorizeRequests(authorize->authorize.anyRequest().authenticated()).oauth2Login(oauth2->oauth2.tokenEndpoint(token->token.accessTokenResponseClient(mockAccessTokenResponseClient())).userInfoEndpoint(userInfo->userInfo.userService(mockUserService())));return http.build();}
利用 mock when thenReturn 做了一个拦截器。
private OAuth2AccessTokenResponseClient<OAuth2AuthorizationCodeGrantRequest> mockAccessTokenResponseClient(){OAuth2AccessTokenResponse auth2AccessTokenResponse=OAuth2AccessTokenResponse.withToken("access-token-1234").tokenType(OAuth2AccessToken.TokenType.BEARER).expiresIn(60*1000).build();//模拟系统中的OAuth2AccessTokenResponseClient,一旦发生了getTokenResponse,就返回自己的auth2AccessTokenResponseOAuth2AccessTokenResponseClient tokenResponseClient=mock(OAuth2AccessTokenResponseClient.class);when(tokenResponseClient.getTokenResponse(any())).thenReturn(auth2AccessTokenResponse);return tokenResponseClient;}
可以模拟一下一个 service
AService aService=mock(AService.class)when(aService.fun1(any())).thenReturn(对象)return aService;
同时可以看看代码中``webClient`的使用方法。
3. Resource Server
要使用Resource Server功能,需要引入spring-boot-starter-oauth2-resource-server。
| 项目 | 说明 |
|---|---|
| hello-security | 一个标准的Resource Server,通过指定jwk-set-uri与Spring Authorization Server做集成。 在测试代码中,可以看到如何集成 mock Authorization Server进行测试,这部分其实在 jwe 例子中做了详细的说明,这里可以参考一下。 |
| jwe | 演示了如何链接一个mock Authorization Server。使用了JWE-encrypted tokens,可以作为一个单独启动的服务,去展示你可以加密自己的 OAuth 2.0 Bearer Tokens。 |
| static | 不通过jwk-set-uri与Spring Authorization Server做集成。而是将解密的密钥放在本地。 |
| multi-tenancy | 多租户的例子 |
| opaque | 不透明Tokens |
3.1 hello-security
① http-client 测试
按照官网的帮助文档是通过脚本进行手工测试,在这个例子中使用了http-client类似于PostMan的进行测试。
### 获取Token POST {{AuthServerUri}}/oauth2/token Authorization: Basicmessaging-client secret Content-Type: application/x-www-form-urlencodedgrant_type=client_credentials&scope=message:read > {%client.log(response.body.access_token); client.test("Request executedsuccessfully", function() { client.assert(response.status === 200, "Responsestatus is not 200"); }); client.global.set("access_token",response.body.access_token); %}
② 开发步骤
第一步:建立一个普通的
Application第二步:进行
ResourceServer配置配置 application.yml
- spring:security:oauth2:resourceserver:jwt:jwk-set-uri: http://localhost:9000/oauth2/jwks
配额访问权限
- @EnableWebSecuritypublic class OAuth2ResourceServerSecurityConfiguration {@Value("${spring.security.oauth2.resourceserver.jwt.jwk-set-uri}")String jwkSetUri;@Beanpublic SecurityFilterChain securityFilterChain(HttpSecurity http) throws Exception{http.authorizeRequests(authorize->authorize.antMatchers(HttpMethod.GET,"/message/**").hasAuthority("SCOPE_message:read").antMatchers(HttpMethod.POST,"/message/**").hasAuthority("SCOPE_message:write").anyRequest().authenticated());//http.oauth2ResourceServer(OAuth2ResourceServerConfigurer::jwt); 与下面的功能是一样的http.oauth2ResourceServer((oauth2) -> oauth2.jwt(withDefaults()));return http.build();}/*** 在官方代码中有下面的函数,但是实际上不需要。可以注释了*/// @Bean// JwtDecoder jwtDecoder(){// return NimbusJwtDecoder.withJwkSetUri(this.jwkSetUri).build();// }}
- 关于如何配置 ResourceServer,有这么一个文档
第三步:撰写@RestController
- @RestControllerpublic class OAuth2ResourceServerController {@GetMapping("/")public String index(@AuthenticationPrincipal Jwt jwt){return String.format("Hello %s!",jwt.getSubject());}@GetMapping("/message")public String message(){return "secret message";}@PostMapping("/message")public String createMessage(@RequestBody String message){return String.format("Message was created. Content: %s",message);}}
③ 开发备注
如果参考官方文档,会有一种更简单的做法,使用了 issuer-uri ,这样就不用手工指定 jwk-set-uri
spring:security:oauth2:resourceserver:jwt:issuer-uri: http://localhost:9000# jwk-set-uri: http://localhost:9000/oauth2/jwks
④ 单元测试
在这个代码中,我犯了一个错误,由于测试的目录与实际的不一样,结果没有自动找到``SpringBootApplication`入口配置,所以最后把目录配置成一样了。
新的版本中import static org.hamcrest.CoreMatchers.is;这个包找不到了,估计要替换掉了。
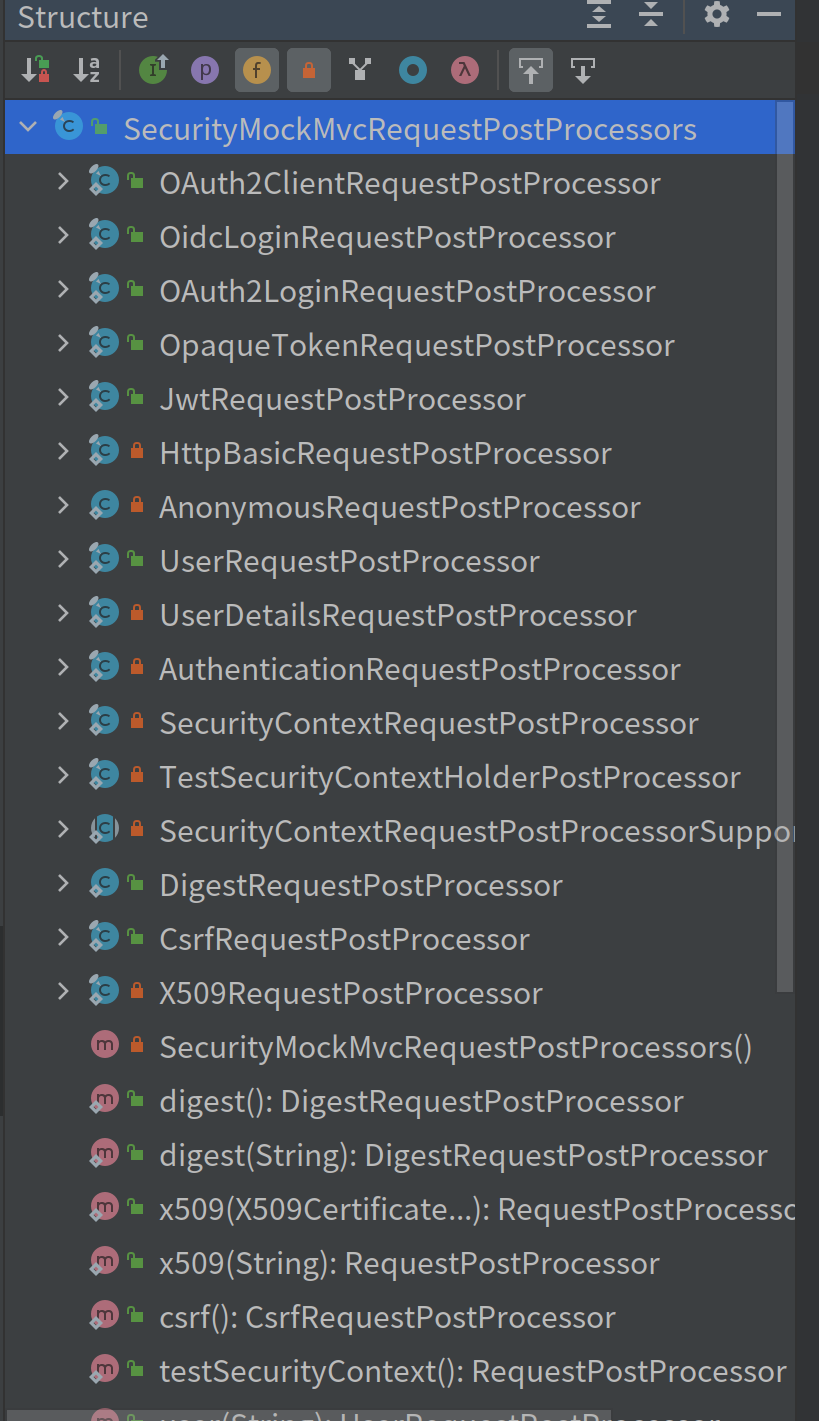
MockMvc中SecurityMockMvcRequestPostProcessors类很关键,包含了一些默认的方法,这里有一个文档描述了 RequestPostProcessors 作用。从下图,可以看出来这个类模拟大部分登陆的内容。
这个测试类就是为了使用这个类:
@Testvoid indexGreetsAuthenticatedUser() throws Exception{this.mockMvc.perform(get("/").with(jwt().jwt(jwt->jwt.subject("ch4mpy")))).andExpect(content().string("Hello ch4mpy!"));this.mockMvc.perform(post("/message").content("Hello message").with(jwt().jwt(jwt->jwt.claim("scope","message:write")))).andExpect(status().isOk());}
⑤ 动态修改配置文件
第一步:实现接口
EnvironmentPostProcessor- @FunctionalInterfacepublic interface EnvironmentPostProcessor {/*** Post-process the given {@code environment}.* @param environment the environment to post-process* @param application the application to which the environment belongs*/void postProcessEnvironment(ConfigurableEnvironment environment, SpringApplication application);}
第二步:在
META-INF/spring.factories中配置这个文件的路径补充:
要提高优先级,请用
@Order下面的代码,选自:
SpringBootTestRandomPortEnvironmentPostProcessor- @Overridepublic void postProcessEnvironment(ConfigurableEnvironment environment, SpringApplication application) {MapPropertySource source = (MapPropertySource) environment.getPropertySources().get(TestPropertySourceUtils.INLINED_PROPERTIES_PROPERTY_SOURCE_NAME);if (source == null || isTestServerPortFixed(source, environment) || isTestManagementPortConfigured(source)) {return;}Integer managementPort = getPropertyAsInteger(environment, MANAGEMENT_PORT_PROPERTY, null);if (managementPort == null || managementPort.equals(-1) || managementPort.equals(0)) {return;}Integer serverPort = getPropertyAsInteger(environment, SERVER_PORT_PROPERTY, 8080);if (!managementPort.equals(serverPort)) {source.getSource().put(MANAGEMENT_PORT_PROPERTY, "0");}else {source.getSource().put(MANAGEMENT_PORT_PROPERTY, "");}}
⑥ OkHttp3:mockwebserver
MockWebServer则是OkHttp3提供的一个快速创建 HTTP 服务端的工具。当我们的服务需要依赖外部 HTTP 应用时,可以按照预期功能快速构建外部 HTTP 应用,加快开发流程,快速进行单元测试,完善代码。搭配OkHttp3使用时,可以测试我们自己编写的OkHttp3客户端代码
MockWebServer server = new MockWebServer();MockResponse mockResponse = new MockResponse().setBody("hello, world!")server.enqueue(mockResponse);try {server.start(8080);} catch (IOException e) {e.printStackTrace();}
正常的 HTTP 请求一般会对不同路径的请求返回不同的结果,MockWebServer通过Dispatcher支持该功能。
MockWebServer server = new MockWebServer();final Dispatcher dispatcher = new Dispatcher() {@Overridepublic MockResponse dispatch(RecordedRequest request) throws InterruptedException {if (request.getPath().equals("/v1/login/auth/")){return new MockResponse().setResponseCode(200);} else if (request.getPath().equals("/v1/check/version")){return new MockResponse().setResponseCode(200).setBody("version=9");} else if (request.getPath().equals("/v1/profile/info")) {return new MockResponse().setResponseCode(200).setBody("{\\\"info\\\":{\\\"name\":\"Lucas Albuquerque\",\"age\":\"21\",\"gender\":\"male\"}}");}return new MockResponse().setResponseCode(404);}};server.setDispatcher(dispatcher);try {server.start(8099);} catch (IOException e) {e.printStackTrace();System.exit(0);}
⑦ 官方的集成测试
以前是使用了 9000 服务器,现在要模拟一个服务器。
官方例子代码思路如下:
定义 application-test.yml,其中要模拟一个服务器地址:mockwebserver.url
- jwk-set-uri: ${mockwebserver.url}/.well-known/jwks.json
为了要做一个变量呢? 因为怕占用端口。追求高自动化测试。
为了实现这个变量,需要定义如下的工作
实现一个 EnvironmentPostProcessor 类,将 mockwebserver 变量注入到配置文件中。
同时启动了一个 MockWebServer 服务器
官方代码的好处:
- 可以自动获取端口,不用因为测试时候,端口被占用,引发测试失败。
官方代码的缺点:
- 代码看起来过于复杂。因为引入了 EnvironmentPostProcessor 类
- 将代码放入到 src 中,对源代码的侵入性比较大。
⑧ 优化后的集成测试
省去了 EnvironmentPostProcessor,将模拟的服务器端口写死,然后将 MockWebServer 放入到 Test 代码中
⑨ JSON Web Key Set Properties
{"keys": [{"alg": "RS256","kty": "RSA","use": "sig","x5c": ["MIIC+DCCAeCgAwIBAgIJBIGjYW6hFpn2MA0GCSqGSIb3DQEBBQUAMCMxITAfBgNVBAMTGGN1c3RvbWVyLWRlbW9zLmF1dGgwLmNvbTAeFw0xNjExMjIyMjIyMDVaFw0zMDA4MDEyMjIyMDVaMCMxITAfBgNVBAMTGGN1c3RvbWVyLWRlbW9zLmF1dGgwLmNvbTCCASIwDQYJKoZIhvcNAQEBBQADggEPADCCAQoCggEBAMnjZc5bm/eGIHq09N9HKHahM7Y31P0ul+A2wwP4lSpIwFrWHzxw88/7Dwk9QMc+orGXX95R6av4GF+Es/nG3uK45ooMVMa/hYCh0Mtx3gnSuoTavQEkLzCvSwTqVwzZ+5noukWVqJuMKNwjL77GNcPLY7Xy2/skMCT5bR8UoWaufooQvYq6SyPcRAU4BtdquZRiBT4U5f+4pwNTxSvey7ki50yc1tG49Per/0zA4O6Tlpv8x7Red6m1bCNHt7+Z5nSl3RX/QYyAEUX1a28VcYmR41Osy+o2OUCXYdUAphDaHo4/8rbKTJhlu8jEcc1KoMXAKjgaVZtG/v5ltx6AXY0CAwEAAaMvMC0wDAYDVR0TBAUwAwEB/zAdBgNVHQ4EFgQUQxFG602h1cG+pnyvJoy9pGJJoCswDQYJKoZIhvcNAQEFBQADggEBAGvtCbzGNBUJPLICth3mLsX0Z4z8T8iu4tyoiuAshP/Ry/ZBnFnXmhD8vwgMZ2lTgUWwlrvlgN+fAtYKnwFO2G3BOCFw96Nm8So9sjTda9CCZ3dhoH57F/hVMBB0K6xhklAc0b5ZxUpCIN92v/w+xZoz1XQBHe8ZbRHaP1HpRM4M7DJk2G5cgUCyu3UBvYS41sHvzrxQ3z7vIePRA4WF4bEkfX12gvny0RsPkrbVMXX1Rj9t6V7QXrbPYBAO+43JvDGYawxYVvLhz+BJ45x50GFQmHszfY3BR9TPK8xmMmQwtIvLu1PMttNCs7niCYkSiUv2sc2mlq1i3IashGkkgmo="],"n": "yeNlzlub94YgerT030codqEztjfU_S6X4DbDA_iVKkjAWtYfPHDzz_sPCT1Axz6isZdf3lHpq_gYX4Sz-cbe4rjmigxUxr-FgKHQy3HeCdK6hNq9ASQvMK9LBOpXDNn7mei6RZWom4wo3CMvvsY1w8tjtfLb-yQwJPltHxShZq5-ihC9irpLI9xEBTgG12q5lGIFPhTl_7inA1PFK97LuSLnTJzW0bj096v_TMDg7pOWm_zHtF53qbVsI0e3v5nmdKXdFf9BjIARRfVrbxVxiZHjU6zL6jY5QJdh1QCmENoejj_ytspMmGW7yMRxzUqgxcAqOBpVm0b-_mW3HoBdjQ","e": "AQAB","kid": "NjVBRjY5MDlCMUIwNzU4RTA2QzZFMDQ4QzQ2MDAyQjVDNjk1RTM2Qg","x5t": "NjVBRjY5MDlCMUIwNzU4RTA2QzZFMDQ4QzQ2MDAyQjVDNjk1RTM2Qg"}]}
| Property name | Description |
|---|---|
alg | 与密钥一起使用的特定加密算法。 |
kty | 与密钥一起使用的密码算法系列。 |
use | 如何使用密钥; sig 代表签名。 |
x5c | x.509 证书链. 数组中的第一个条目是用于令牌验证的证书;其他证书可用于验证第一个证书。 |
n | RSA 公钥的模数。 |
e | RSA 公钥的指数。 |
kid | 密钥的唯一标识符。 |
x5t | x.509 证书的指纹(SHA-1 指纹)。 |
3.2 jwe
① 什么是 JWT,JWS 与 JWE
JWT=Json Web Token
现在网上大多数介绍JWT的文章实际介绍的都是JWS(JSON Web Signature),也往往导致了人们对于JWT的误解,但是JWT并不等于JWS,JWS只是JWT的一种实现,除了JWS外,JWE(JSON Web Encryption)也是JWT的一种实现。
② JSON Web Signature(JWS)
JSON Web Signature 是一个有着简单的统一表达形式的字符串:
头部(Header)
头部用于描述关于该 JWT 的最基本的信息,例如其类型以及签名所用的算法等。 JSON 内容要经 Base64 编码生成字符串成为 Header。
载荷(PayLoad)
payload 的五个字段都是由 JWT 的标准所定义的。
- iss: 该 JWT 的签发者
- sub: 该 JWT 所面向的用户
- aud: 接收该 JWT 的一方
- exp(expires): 什么时候过期,这里是一个 Unix 时间戳
- iat(issued at): 在什么时候签发的
后面的信息可以按需补充。 JSON 内容要经 Base64 编码生成字符串成为 PayLoad。
签名(signature)
这个部分 header 与 payload 通过 header 中声明的加密方式,使用密钥 secret 进行加密,生成签名。
JWS 的主要目的是保证了数据在传输过程中不被修改,验证数据的完整性。但由于仅采用 Base64 对消息内容编码,因此不保证数据的不可泄露性。所以不适合用于传输敏感数据。
③ JSON Web Encryption(JWE)
相对于 JWS,JWE 则同时保证了安全性与数据完整性。 JWE 由五部分组成:
JWE 组成
具体生成步骤为:
- JOSE 含义与 JWS 头部相同。
- 生成一个随机的 Content Encryption Key (CEK)。使用 RSAES-OAEP 加密算法,用公钥加密 CEK,生成 JWE Encrypted Key。
- 生成 JWE 初始化向量。
- 使用 AES GCM 加密算法对明文部分进行加密生成密文 Ciphertext,算法会随之生成一个 128 位的认证标记 Authentication Tag。
- 对五个部分分别进行 base64 编码。
可见,JWE 的计算过程相对繁琐,不够轻量级,因此适合与数据传输而非 token 认证,但该协议也足够安全可靠,用简短字符串描述了传输内容,兼顾数据的安全性与完整性。
④ 代码分析
- 可以 jws 与 jwe 一起用吗? 实验过程中是不能一起用的。代码逻辑是可以的。
- 在 nimbus 的例子中,生成了 token,然后在这个例子中没有实验成功。
3.3 static
这里有两个密钥,分别是官方例子中自带的 simple.pub 与我自己用 OpenSSL 生成的 public.pem。为了让两个密钥都能演示,分别做了两个配置文件
- application.yml
- application-nimbus.yml 这里使用了我自带的密钥。
① 开发
开发的内容很简单,就是开发一个@RestController
@RestControllerpublic class StaticResourceServerController {@GetMapping("/")public String index(@AuthenticationPrincipal Jwt jwt){return String.format("Hello, %s!",jwt.getSubject());}@GetMapping("/message")public String message(){return "secret message";}}
然后编写 ResourceServer 的配置文件
@Configurationpublic class StaticResourceServerConfiguration {@Value("${spring.security.oauth2.resourceserver.jwt.key-value}")RSAPublicKey key;@Beanpublic JwtDecoder jwtDecoder(){return NimbusJwtDecoder.withPublicKey(key).build();}@Beanpublic SecurityFilterChain securityFilterChain(HttpSecurity http) throws Exception {http.authorizeRequests(request->request.antMatchers("/message/**").hasAuthority("SCOPE_message:read").anyRequest().authenticated());//这里多余了这句话。可以使用默认的http.oauth2ResourceServer(oauth2->oauth2.jwt(Customizer.withDefaults()));return http.build();}}
上面代码的重点是:return NimbusJwtDecoder.withPublicKey(key).build();
② 测试
重点是使用了@ActiveProfiles 进行了测试
@SpringBootTest@AutoConfigureMockMvc// 是从官方jwe中复制过来的私钥与公钥。 正常的是自己生成的公钥@ActiveProfiles("nimbus")public class StaticResourceServerApplicationTest {@Value("${test.noScopesToken}")String noScopesToken;@Value("${test.messageReadToken}")String messageReadToken;
3.4 Opaque
① 开发
首先要添加一个 Application,然后添加一个 Controller
接下来配置 application.yml 文件
spring:security:oauth2:resourceserver:opaque:introspection-uri: http://localhost:9000/oauth2/introspectintrospection-client-id: login-clientintrospection-client-secret: openid-connectserver:port: 8903
然后定义配置类
@EnableWebSecuritypublic class OpaqueResourceServerSecurityConfiguration {@Value("${spring.security.oauth2.resourceserver.opaque.introspection-uri}")String introspectionUri;@Value("${spring.security.oauth2.resourceserver.opaque.introspection-client-id}")String clientId;@Value("${spring.security.oauth2.resourceserver.opaque.introspection-client-secret}")String clientSecret;@Beanpublic SecurityFilterChain securityFilterChain(HttpSecurity http) throws Exception{http.authorizeRequests(request->request.mvcMatchers(HttpMethod.GET,"/message/**").hasAuthority("SCOPE_message:read").mvcMatchers(HttpMethod.POST,"message/**").hasAuthority("SCOPE_message:write").anyRequest().authenticated());http.oauth2ResourceServer(oauth2->oauth2.opaqueToken(opaque->opaque.introspectionUri(this.introspectionUri).introspectionClientCredentials(this.clientId,this.clientSecret)));return http.build();}}
② 测试
官方的代码是使用了一个模拟的服务器。
这里,我使用了一个真实的服务器。9000 服务器。然后用 http client 进行了测试。
测试都通过了。